Purpose: To guide you through the process of creating your own Custom Objects as they pertain to your business.
TABLE OF CONTENTS |
Step-By-Step Guide
Step 1: Navigate to the Custom Objects page:
- Click Data from the top menu bar, or click this link: https://fmo.kizen.com/custom-objects
- Click Custom Objects.
- Select New Object.

Attention: Objects cannot have the same name as existing custom objects (i.e. Contacts, Companies, etc.)Step 2: Enter the Object Name:
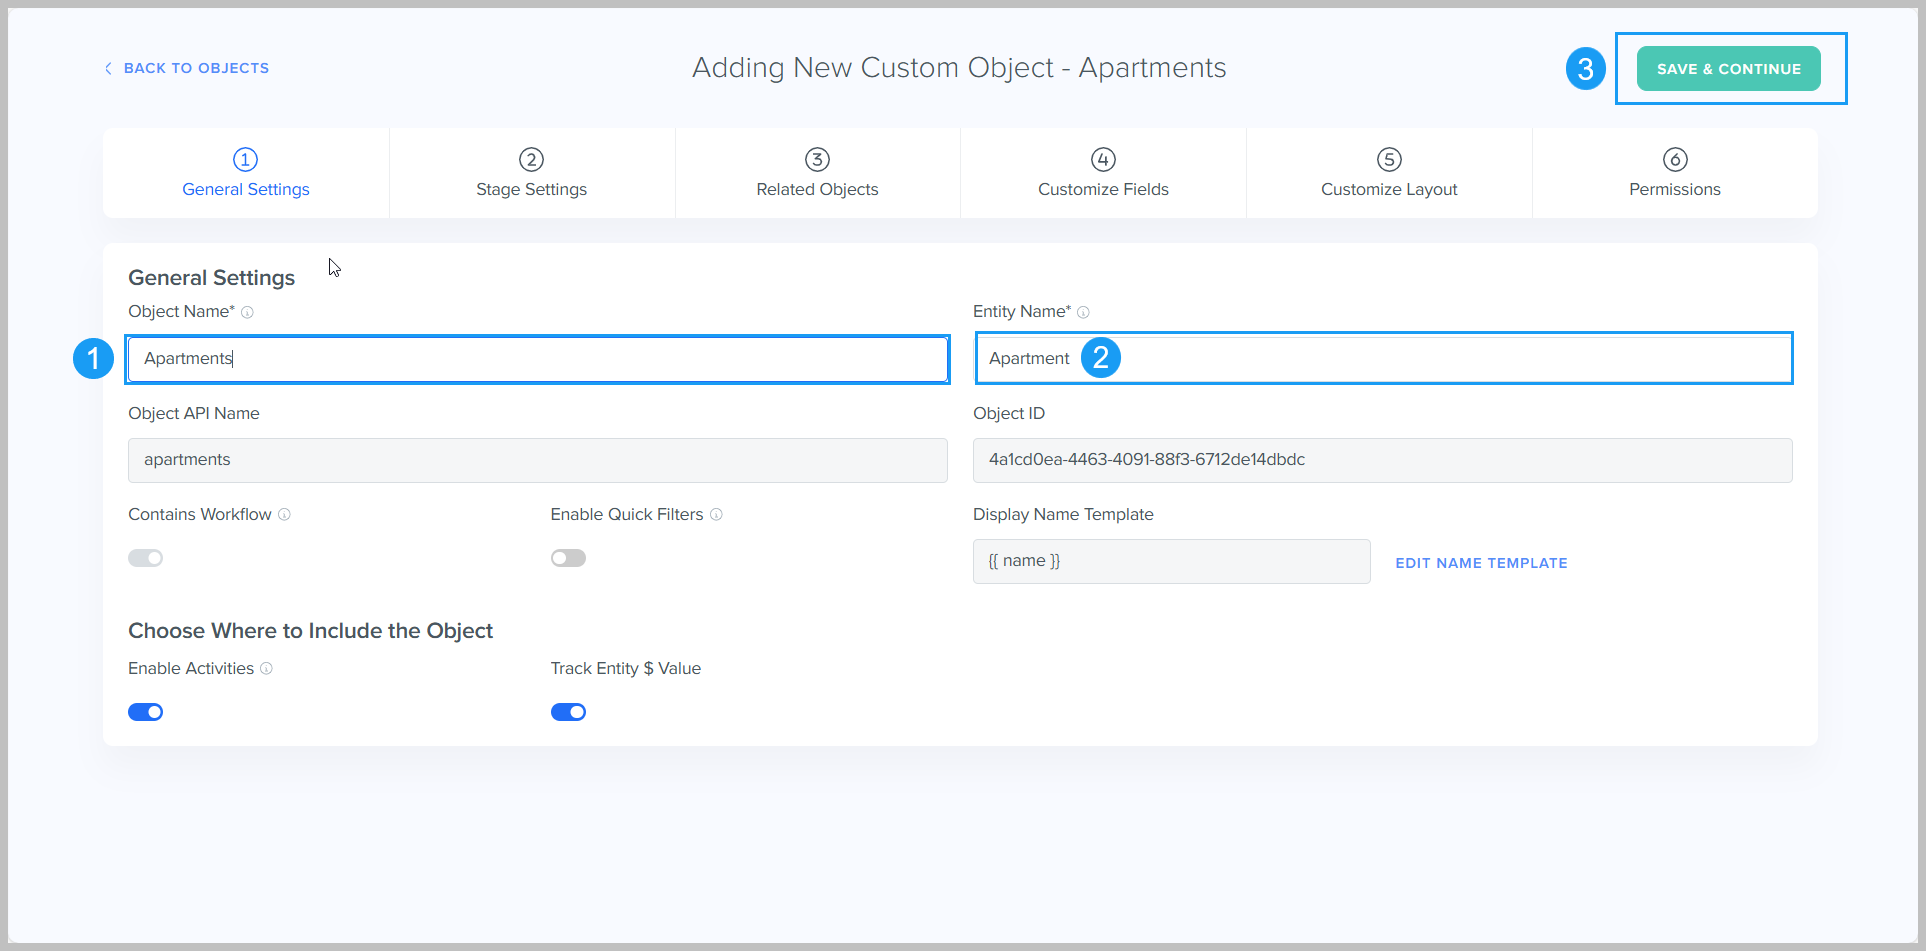
- Enter the Object Name inside of the textboxes on the General Settings tab.
- Enter the Entity Name inside of the textboxes on the General Settings tab. Note: Entity Name is also known as Record Name, this is what individual entities will be called. Example: If the object name is "Apartments" the entity name might be called "Apartment."
- Click Save & Continue.
- Optional features that you can toggle on and off by clicking the radio button:
- Contains Workflow = toggle this setting on if your entities are going to be moving through a workflow with open and closed stages. Ex: Sales Pipelines, Support ticketing and project management.
- Enable Quick Filters = quick filters enable a second form of less-detailed filtering on records, chart groups and board views that are pre-defined.
- Choose where to include the object: Enable activities = Associate this object with logged or scheduled activities.
- Track Entity $ Value = toggle this setting on if your entities will require tracking a monetary value.
- Edit Name Template = editing the name will update the display name template which will change how this record appears in related object fields and timeline entries. Upon update, all records will be updated asynchronously. Set to API Display Name by default.

Step 3: Enter the Stage Names: (Optional)
- If you choose to do a workflow, you can navigate to the Stage Settings and create all of the Stage Names by clicking +Add Stage
- Click Save.
- Optional features that you can toggle on and off by clicking the radio button:
- Include % Chance to Close = enabled by default, you can display this percentage in pipeline dashlets with forecasting and estimated value.
- Use AI to Update Stage %s = Turning this on will override your set values and use Kizen’s AI to monitor your pipeline and automatically set % chances to close based on your team’s historical performance. You can set your desired AI speed and accuracy to get started.
- Reasons Lost - This section will be available once you add a stage with the Lost status.
- Reasons Disqualified - This section will be available once you add a stage with the Disqualified status.

Step 4: Fill out the Related Objects: (Optional)
- Navigate to the Related Objects
- Here you can set the Include the Related Records for Lead Sources which is turned on by default. You may disable them by ticking the radio button.
- Set the object Team Associations.
- You can also set the primary relationships or add additional relationships by clicking +Add Related Object. These relationships will create multi-select fields to represent multiple associations between your data. For example, we recommend using an additional relationship for deals that may have additional points of contact.
- Share Timeline To Related and Share Timeline From Related is turned on by default. You may disable them by ticking the radio buttons. Share Timeline to related entries will be shared from this object's record to the associated objects record. Share Timeline from Related will be shared from this object's record and displayed on associated records of this object.
- Click Save.

Step 5: Customize Fields: (Optional)
A. You can add a new Category by clicking add new Category, and entering the Category Name and click save.

B. You can add a new custom field by clicking +Add New Field: How to Add Custom Fields

Step 6: Customize Layouts: (Optional)
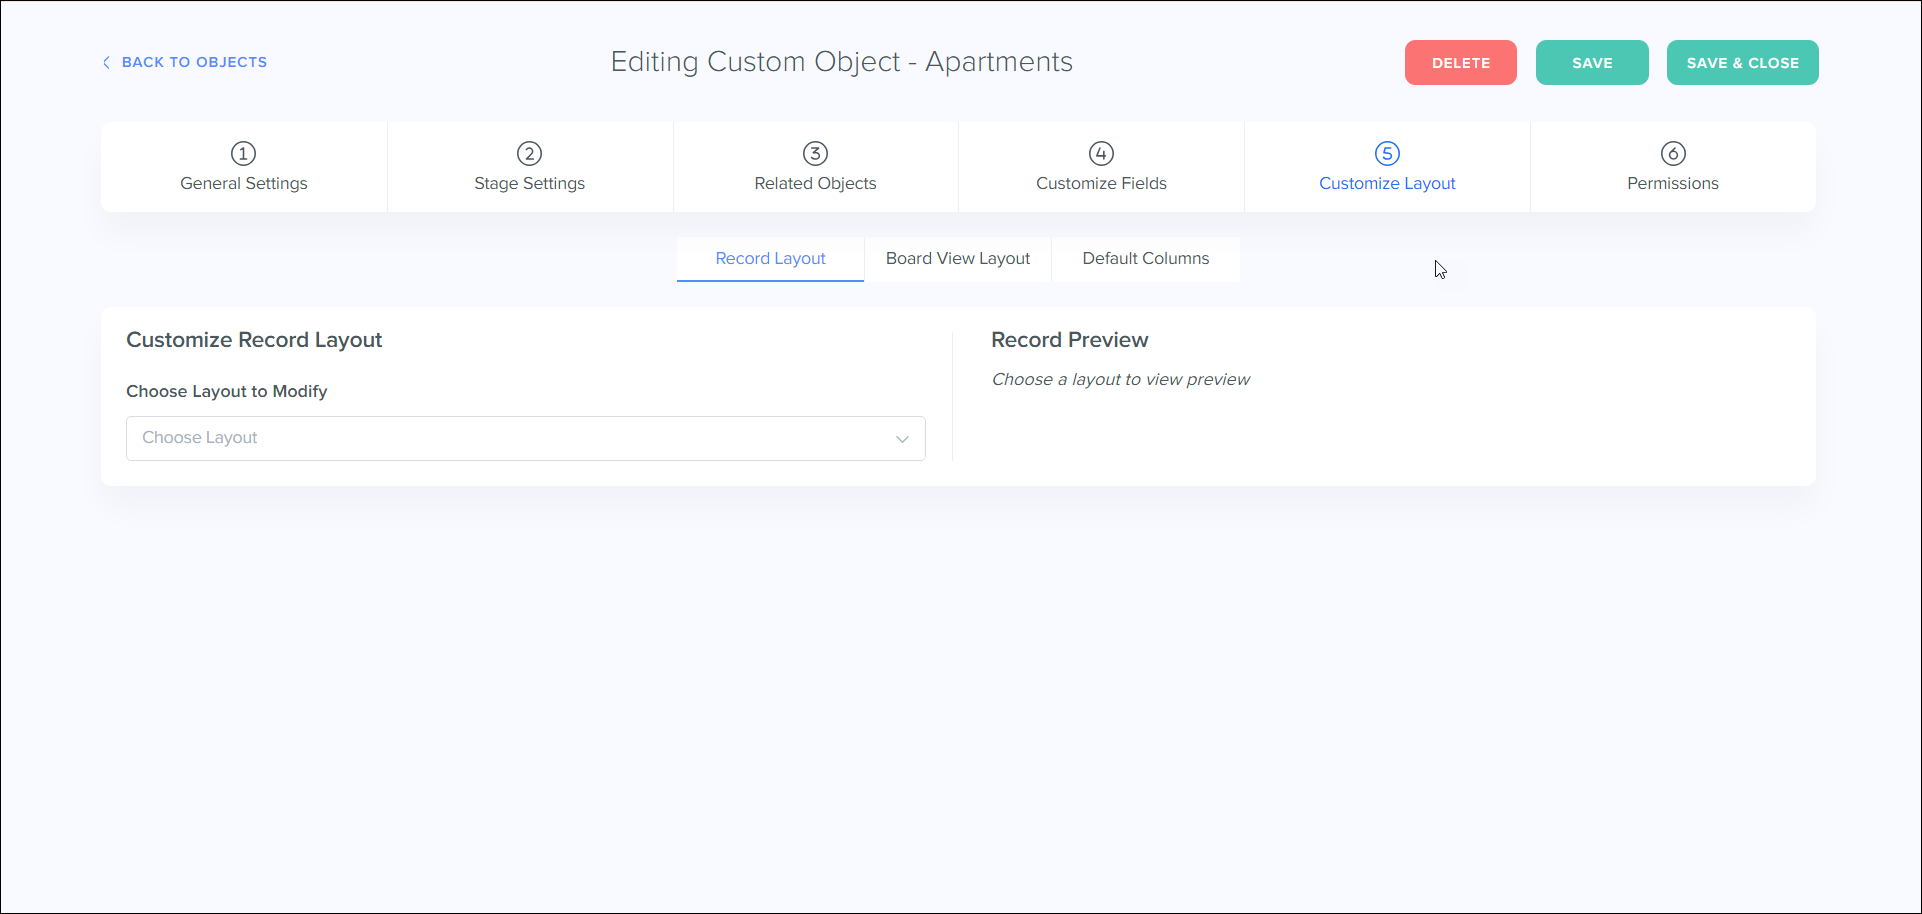
You can customize a Record Layout, a Board View Layout and also set the Default Columns and then Click Save. You can learn how to build a customized layout by clicking here: How to Build a Layout

Step 7: Permissions: (Optional)
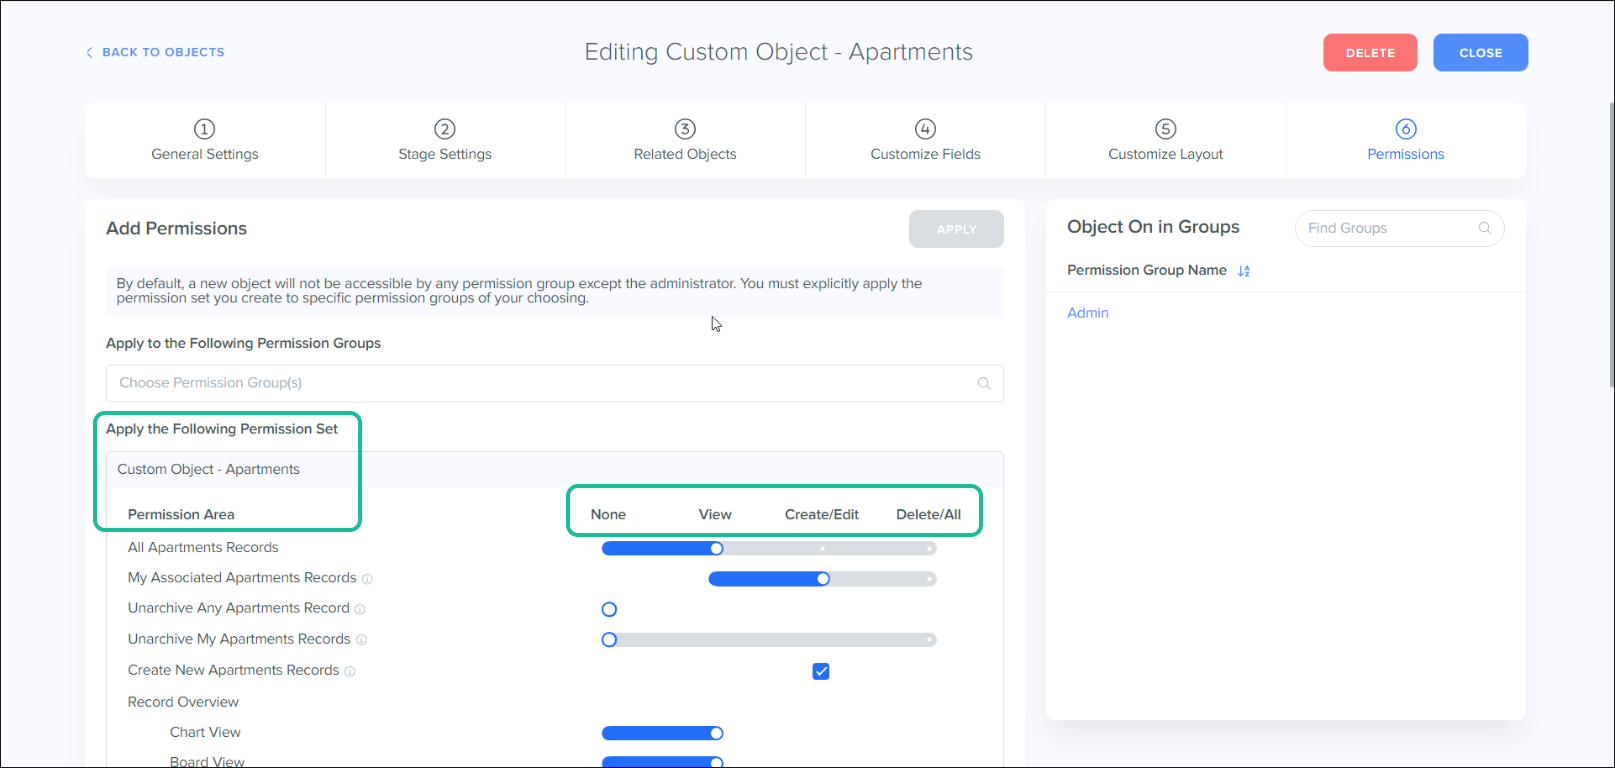
You can add permissions by applying permission sets to each record in the permission group you have selected. You can learn more about permissions by clicking here: Team, Roles, & Permissions

Note: By default, a new object will not be accessible by any permission group except the administrator. You must explicitly apply the permission set you create to specific permission groups of your choosing.
Attention: The General Settings tab needs to be filled out in its entirety but if the other tabs do not apply they may be bypassed by clicking the "Save & Close" button.Was this article helpful?
That’s Great!
Thank you for your feedback
Sorry! We couldn't be helpful
Thank you for your feedback
Feedback sent
We appreciate your effort and will try to fix the article