Purpose: The purpose of this article is to explain what is a custom field and walk the user through the steps necessary to create a custom field.
TABLE OF CONTENTS |
Step-By-Step Guide
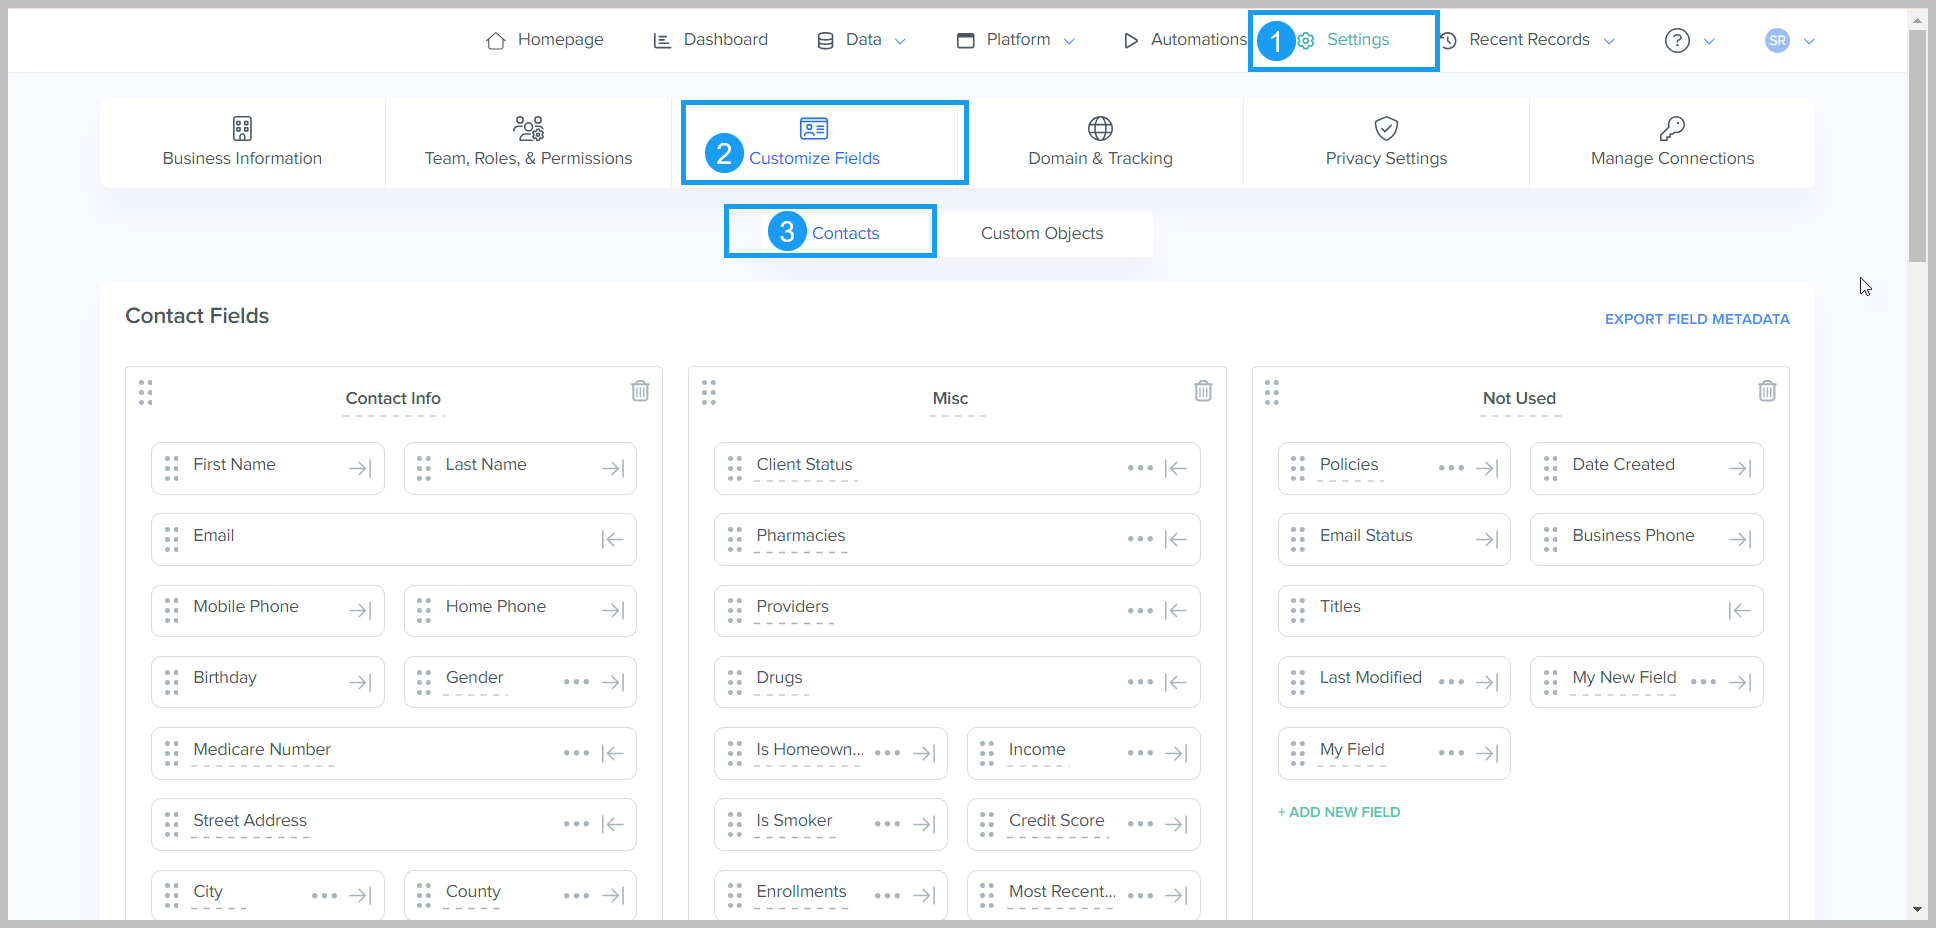
Step 1: Navigate to the Customize Fields section in your settings.
1. There are two available interfaces for Customized Fields. There is the Customized Fields interface which is directly on an object and then there is the customized fields interface that is through the settings menu item.
2. Directly on an object. You may go through the Contacts or custom objects screen to arrive at the customize fields screen

3. If you are an administrator, you can access and customize fields for all objects inside the global application settings. Clicking Settings from the top menu bar. You can Click Customize Fields: https://fmo.kizen.com/settings/custom-fields/contacts

Note: If you do not have the necessary permissions please contact an administrator. If you would like to learn more about object level permissions or put in a request for super admin permissions you can click here: How to request super admin permissions
4. Navigate to the Custom Object you would like to relate the Custom Field to. If you want to get directly to custom fields, once you're there, you can choose whether you want to add custom fields to a contact or any of your custom objects.
E. Find the appropriate category, click +Add New Field:

If you are not sure what a custom object is please click here to learn more: What is a custom object?
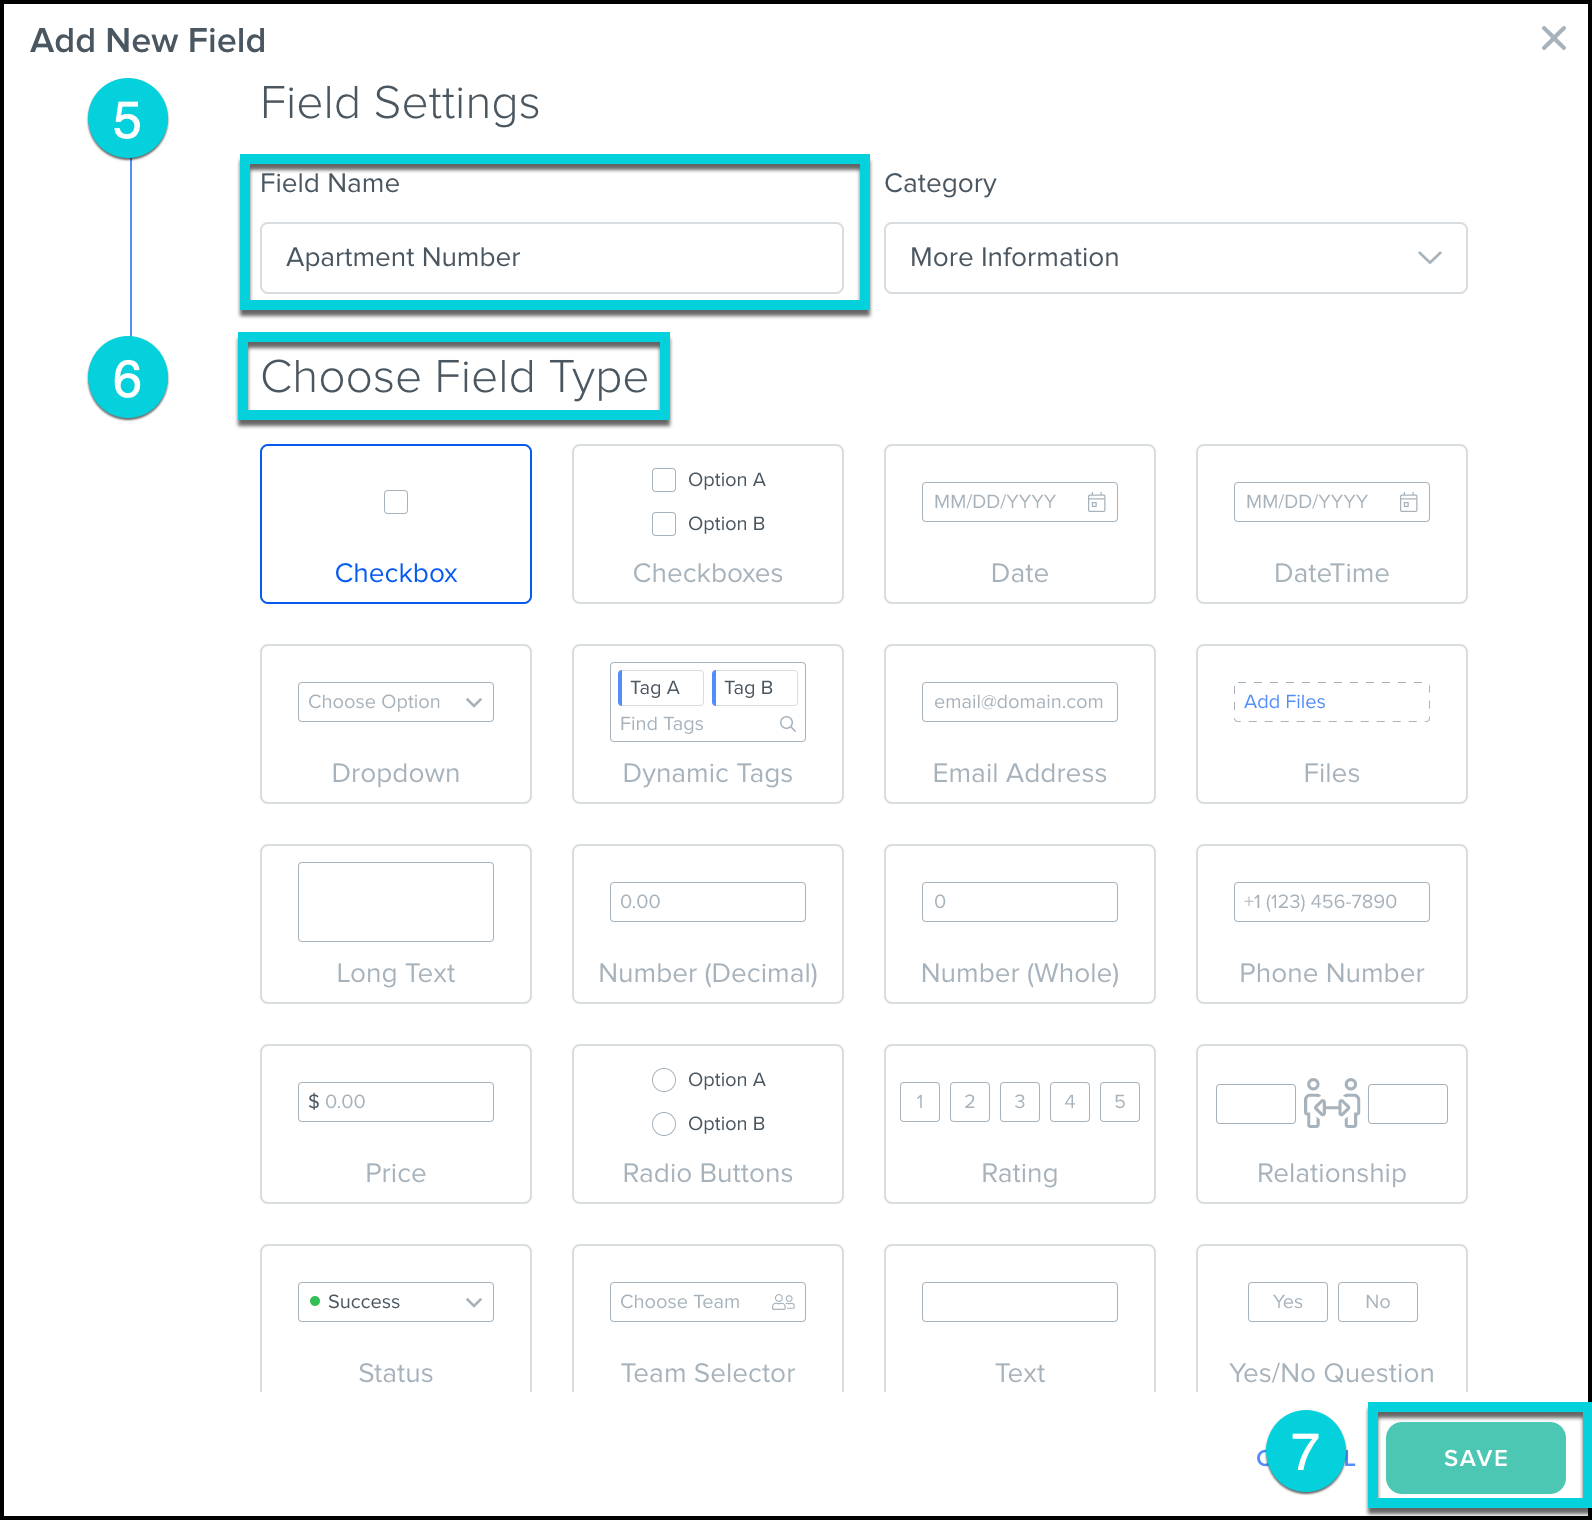
Step 2: Fill out the Field Name and Type.
- A dialog box appears, Enter the Field Name and Category.
- Choose the Field Type. Note: Based on the chosen field type, additional settings may need to be configured in the pop-up.
- Click Save.
- Once you have filled out the Field Settings, you may need to assign values to specify the available options that will be listed for the user to choose from. The options will vary, depending on the chosen field type. Here is a complete list of Custom Field Types

e. When you create a new custom field that users may be granted access to, these custom fields are based on the permissions that you set. Each permission group grants a specific default set of access to new fields. This level of permissions is put into both the data model, and the view. Specifically in that category, it will automatically show up in the view for all that have permissions to that custom field.
f. Once you have successfully added a field, you are assigned a field ID and an API name that you can customize. If you would like to change the API name of a field, you can edit it once the field has been created. Click here to learn more: How do I edit a Custom Field?
Other Custom Field Actions:
Was this article helpful?
That’s Great!
Thank you for your feedback
Sorry! We couldn't be helpful
Thank you for your feedback
Feedback sent
We appreciate your effort and will try to fix the article